To recap, I finalized my drawing for my print in my sketchbook, and then, I traced it onto tracing paper.
Now, I take my block, which I have cut to the size of my drawing (or I make my drawing the size of the available block--did I mention I often like to use a soft block rather than linoleum which is much easier to cut and carve?) and turn the tracing paper graphite-side- down on top of the block.

To transfer the drawing, I color the back with pencil. When I lift the tracing paper, I should see an exact image of my drawing in reverse on the block.
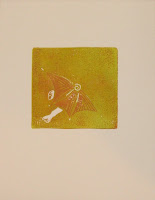
 Here is the print after two stages of cutting on the block. First, I removed the top layer of the block in all the places I wanted to remain white in my final print (or the color of the paper) and then printed with my first color, which was supposed to be "sand colored."
What follows is not the clean and simple step by step I had planned on, but is an example of problem solving that happens often in the creative process. That first color turned out to be browner and darker than I wanted. I compounded my color problem by cutting the three sections of my beach umbrella before I meant to.
So, to help resolve these issues, I printed over the darker brown with a yellow ink to lighten the sand and left the darker color to become the light side of my umbrella. Looking at the result, I changed the whole idea of the colors I was going to use in this image.
The block now looks like this after two stages of cutting.

More next time.
No comments:
Post a Comment